Unique Nail Art Ideas to Try for Your Next Manicure
We may earn a commission for purchases made using our links. Please see our disclosure to learn more.
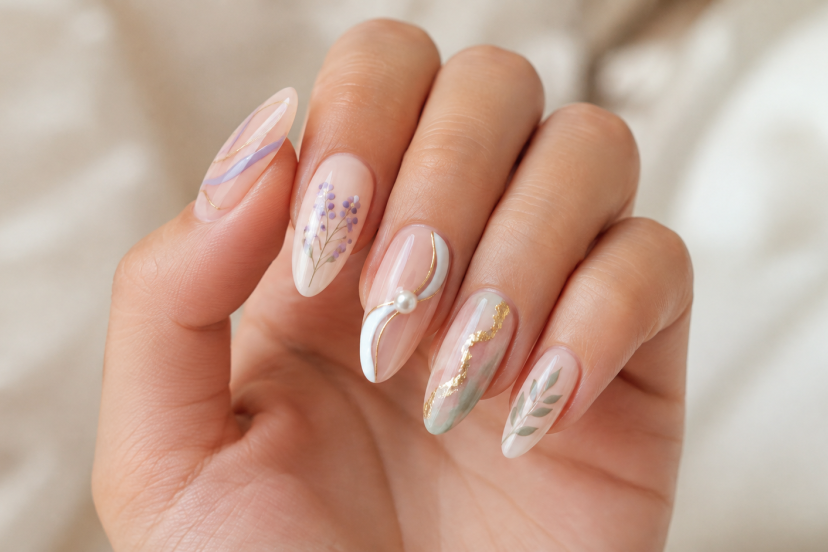
Bored of seeing the same nail art duplicates all day? How are you supposed to get excited for your next mani when all of the options feel the same? Unique nail art designs allow you to experiment with something that feels more personal, whether that’s combining unexpected colors, incorporating playful elements or putting a creative twist on a classic look. Try these ideas at home to nail your next manicure based on your nail length and nail shape.
What Makes Nail Art Feel Unique?
Original nail art always has a little something that outlooks or outright surprises the eye. That might involve offsetting a design, mixing finishes or using colors that don’t traditionally pair.
Even a personal nail design is a distinctive mark. Maybe you’d like to include your birth flower, favourite animal, initials or a symbol related to a special place. So, even if you’re following a classic look, personalisation like this can make the final result feel a little bit more ‘you’.
If you are still building your manicure supplies, this guide to essential nail art tools for beginners explains which brushes and accessories can help you get started.
Abstract Swirls and Freehand Lines
Abstract nail art works well because it does not demand perfect symmetry. Begin with a neutral base and paint loose lines, curved blocks, or overlapping shapes in two or three colors.
For a modern palette, combine terracotta, cream, and black. Lilac, orange, and pale pink create a brighter look. You can also outline one shape with metallic polish to add definition.
A long liner brush gives you smooth curves. However, slight differences between nails add character, so resist the urge to make every line identical.
Try a Modern Mismatched Manicure
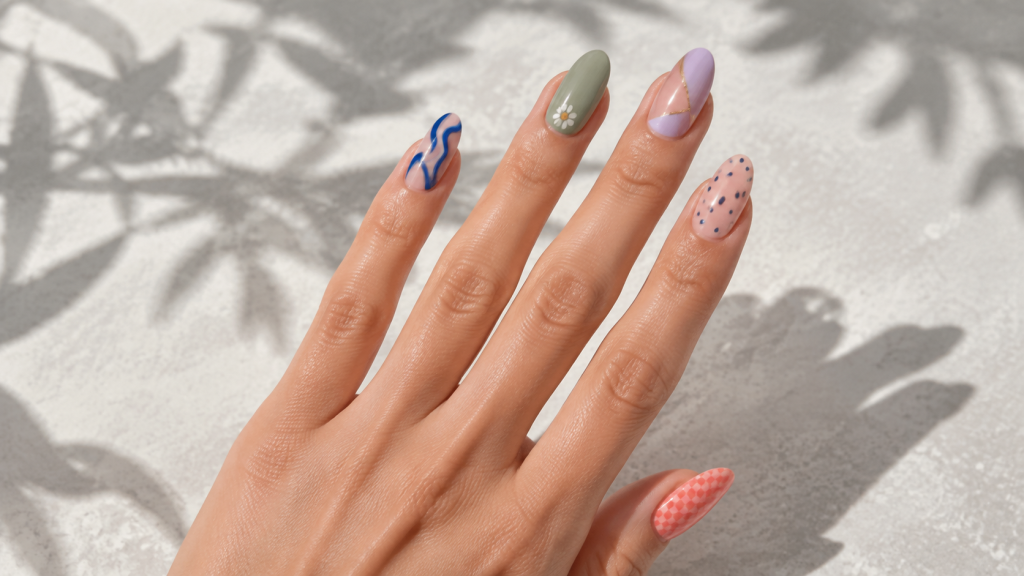
Mismatched nails follow a shared theme without repeating one design across all ten fingers. One nail might have dots, another might feature a checkerboard, and a third might use a solid color.
Choose a limited palette to keep the manicure cohesive. Three coordinating shades plus one neutral usually provide enough variety without making the set look chaotic.
You can also give each hand a different dominant color. For example, use mostly blue designs on one hand and mostly green designs on the other while repeating small white details across both.
Experiment With Negative Space
Negative-space manicures allow part of the natural nail to remain visible. The open areas create contrast and make bold colors feel lighter.
Try diagonal color blocks, floating half-moons, thin outlines, or small geometric shapes. Clear spaces also help the manicure grow out less noticeably because there is no solid band of color next to the cuticle.
Apply a clear base coat first, then use striping tape or a fine brush to define the painted areas. Remove tape while the polish remains slightly wet to produce cleaner edges.
Paint Miniature Floral Details
Floral nails do not need to resemble traditional bouquets. Tiny wildflowers, single-stem daisies, pressed-flower effects, and loose watercolor petals can all look fresh and distinctive.
Create simple blossoms with five small dots around a contrasting center. For more natural-looking flowers, vary the size and direction of each petal.
Place the flowers near one side of the nail rather than covering the entire surface. This asymmetrical composition feels modern and leaves enough open space for the details to stand out.
Add Chrome and Metallic Accents
Chrome powder can transform an ordinary manicure by creating a reflective finish. Instead of covering every nail, apply chrome to selected areas, such as French tips, wavy lines, or small raised details.
Silver chrome looks striking over black, navy, or translucent pink. Gold works beautifully with brown, burgundy, and forest green. For something less expected, try lavender or pale blue chrome over a milky base.
Traditional metallic polish offers a simpler option if you do not use gel. It may not look quite as reflective, but it still produces an eye-catching contrast.
Explore Textured and 3D Nail Art
Texture gives unique nail art a tactile quality. Small pearls, metallic studs, dried flowers, and sculpted gel details can turn a basic manicure into something far more expressive.
Use raised decorations sparingly if you work with your hands throughout the day. One decorated accent nail often delivers the desired effect without making the manicure impractical.
Make sure every embellishment sits securely in nail glue or builder gel. Seal the edges carefully so decorations do not snag on hair or clothing.
Create Aura and Airbrushed Nails
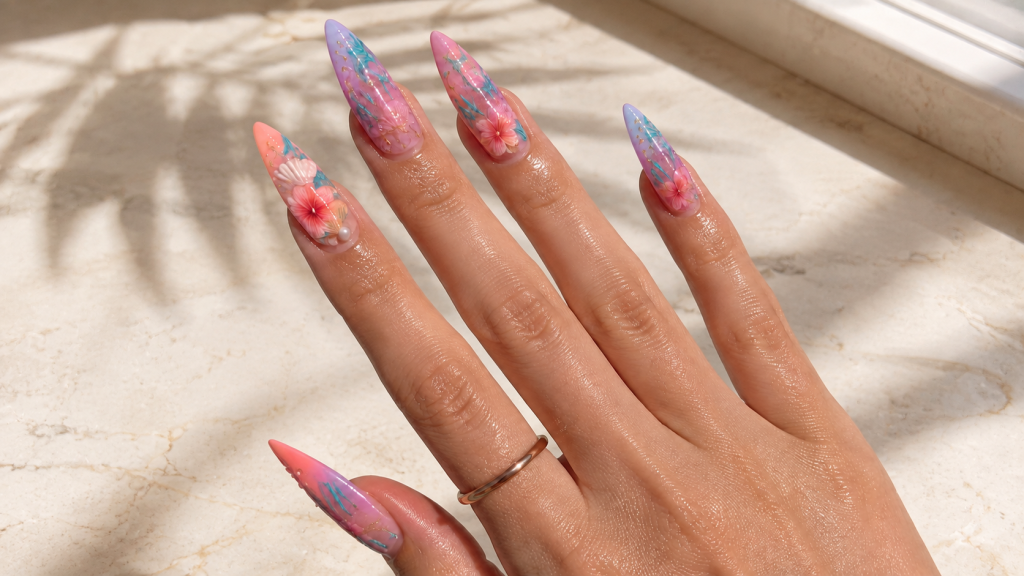
Aura nails feature a soft circle of color that fades into a contrasting background. The effect resembles a glowing light or hazy airbrushed halo.
At home, you can recreate the gradient with a small makeup sponge. Paint the center color onto the sponge, lightly dab it over a dry base, and build the intensity in thin layers.
Try a pink center over orange, icy blue over lavender, or deep red over a smoky brown base. Adding tiny stars or dots can give the design a dreamy finish.
Reinvent the French Manicure
The French manicure is classic, but it does not have to stay traditional. If you like clean nails with a creative twist, this is one of the easiest styles to update.
Instead of white tips, try cobalt blue, emerald green, cherry red, or chocolate brown. Try changing the tip’s outline to give the design a fresh look. Slanted tips, double lines, thin curves, dripping edges, and tiny flame tips all give the French manicure a more modern feel.
For a softer look, keep the base sheer and paint an ultra-thin colored line along the tip. If you prefer something bolder, add a pattern to the tip while leaving the rest of the nail simple. The contrast keeps the design wearable.
Look to Nature for Inspiration
Nature offers endless ideas for unique nail art. Think of agate stones, ocean waves, butterfly wings, tortoiseshell, clouds, leaves, and mossy green tones. These patterns feel familiar but still leave plenty of room for creativity.
The trick is to focus on the mood rather than copying every detail. A moss-inspired manicure, for example, might use olive green, translucent brown, and tiny gold flecks. Ocean-inspired nails could include soft blue gradients, pearl accents, and thin white lines that look like moving water.
Seasonal designs are also easy to personalize. If you like softer colors, these spring nail art designs offer more ideas with florals, pastels, and nature-inspired details.
Match the Design to Your Nail Shape
A design usually looks better when it works with your nail shape. Long almond nails give you more space for flowing lines, detailed florals, gradients, and curved patterns. Square nails work well with checkerboards, color blocks, French tips, and clean geometric designs.
Short nails can still carry beautiful nail art. The key is scale. Small dots, thin vertical lines, tiny flowers, micro French tips, and negative-space details all work well because they do not overwhelm the nail.
Before you commit to a design, sketch the main idea on a simple outline of your nail shape. This helps you see whether the details need to be smaller, wider, or placed differently.
Protect Your Natural Nails
Creative nails should still support healthy natural nails. The American Academy of Dermatology shares helpful manicure safety advice, including avoiding aggressive cuticle cutting and not using artificial nails to cover up a nail problem.
If you wear gel polish, it is also worth thinking about UV exposure. A 2023 laboratory study published in Nature Communications found that radiation from UV nail dryers could damage DNA and cause mutations in mammalian cells. This study looked at cells in a lab, not real-world cancer risk in people, so it does not prove that occasional gel manicures cause cancer. Still, it supports taking sensible precautions.
You can choose traditional air-dried polish, wear fingerless UV gloves, or apply sunscreen to your hands before a gel appointment. If you use gel at home, follow the curing instructions instead of leaving your hands under the lamp longer than needed.
Recommended Products for At-Home Nail Art
If you want to try unique nail art at home, you do not need a huge collection of products. A few reliable basics can help you create cleaner lines, smoother details, and longer-lasting designs.
- OPI Natural Nail Base Coat: This gives polish a smoother surface to grip and helps reduce staining from darker colors.
- Saviland Nail Art Brush Set: A detail brush set is useful for swirls, fine lines, florals, French tips, and small geometric designs.
- Teenitor Nail Art Dotting Tools: Dotting tools make it easier to create flowers, dots, eyes, berries, and other rounded details in different sizes.
- Whats Up Nails Striping Tape: Striping tape helps with negative-space designs, crisp lines, color blocks, and modern French manicures.
- Seche Vite Dry Fast Top Coat: A glossy top coat protects your design and helps regular polish dry faster.
Conclusion
Unique nail art really just means finding little ways to make your mani feel more like you. It’s a new colorway, a small floral detail, a chrome accent, or a new spin on French tips. You don’t need to pick the most difficult design to have standout nails. Start with a concept that speaks to your style and comfort level and work your way up from there. When you start playing with colors, shapes, and finishes, it’s easier to come up with a manicure that feels personal, polished, and fun to wear.
FAQs
What is the easiest unique nail art for beginners?
Dots, abstract lines, and mismatched accent nails are excellent starting points. They require little precision, and small imperfections can look intentional.
How many colors work best for one manicure?
Two to four colors usually create enough visual interest while keeping the design coordinated. Add a neutral base if your chosen shades are especially bright.
Does unique nail art work on shorter nails?
Yes. Short nails look great with micro florals, thin French tips, vertical lines, dots, and negative-space patterns. Simply scale the artwork to fit the available surface.
How long should I wait between polish layers?
Wait until the previous coat feels dry to a light touch. Several thin layers dry more evenly than one thick layer and reduce smudging.
How can I remove 3D decorations safely?
Soak or dissolve the product according to its removal instructions. Never pull decorations off, since this can remove layers from the natural nail.