10 Ombre Nail Designs for a Soft, Stylish Look
We may earn a commission for purchases made using our links. Please see our disclosure to learn more.
Ombre nails are the way to go if you’re looking for a manicure that feels soft, chic and low maintenance. The subtle transition from one shade to another provides just enough visual detail without appearing too busy. You can keep them understated with nudes and white, fun with pastels, or add shimmer for a special occasion. These ombre nail designs can be used for everyday nails, special event nails and even seasonal nails.
Why Ombre Nails Always Look So Effortless
Ombre nails have a way of staying in style without feeling overdone. They are simple enough for everyday wear, but the soft color fade gives them more personality than a plain polish shade.
That’s what makes them so easy to love. A milky pink fade feels clean and elegant. A peach-to-coral blend looks warm and sunny. Add chrome, and suddenly your nails have that glossy, “fresh from the salon” feel.
They are also beginner-friendly. If the blend is not perfect, it still looks soft and pretty. Unlike sharp lines or detailed nail art, ombre gives you a little room to play. That makes it a great choice if you want a polished manicure without stressing over every tiny detail.
10 Ombre Nail Designs to Try
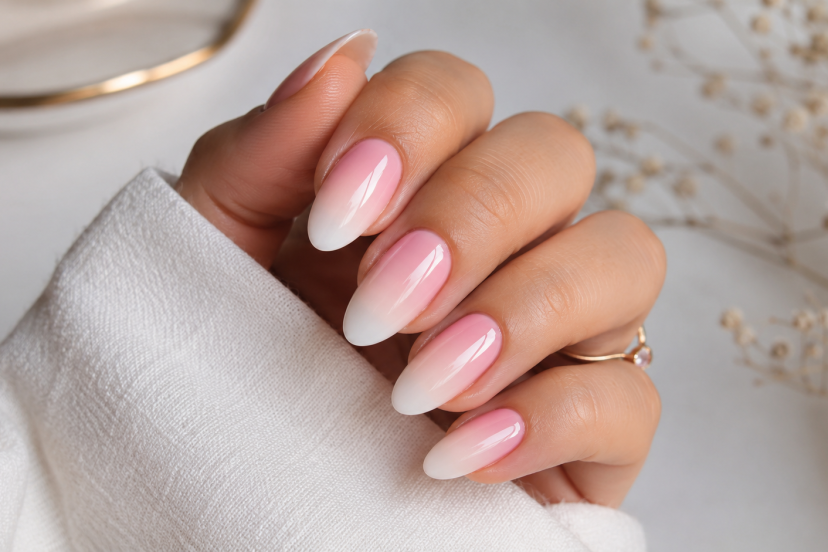
1. Classic Pink and White French Ombre Nails
French ombre nails are soft, clean, and timeless. Instead of a sharp white tip, the white melts gently into a nude or pink base. The result looks like a blurred French manicure.
This design works beautifully for weddings, work events, and everyday nails. It also makes your nails look longer because the gradient creates a stretched, elegant effect.
For the prettiest finish, choose a sheer pink base and a soft white polish. Then blend the colors with a small sponge until the line disappears.
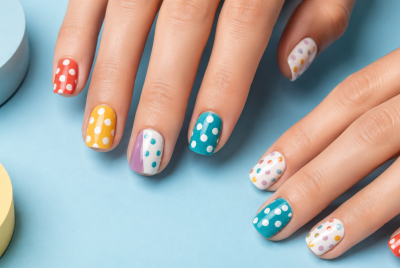
2. Soft Pastel Ombre Nails
Pastel ombre nails are perfect when you want color without going loud. Think lavender fading into baby pink, mint blending into cream, or pale yellow melting into peach.
This style feels especially pretty in spring and summer. However, you can wear it year-round if you love a soft, feminine look. For more seasonal color inspiration, browse these spring pastel nail ideas and pair your favorite shades with an ombre finish.
Pastel gradients look best with glossy top coat because the shine makes the colors feel smooth and fresh.
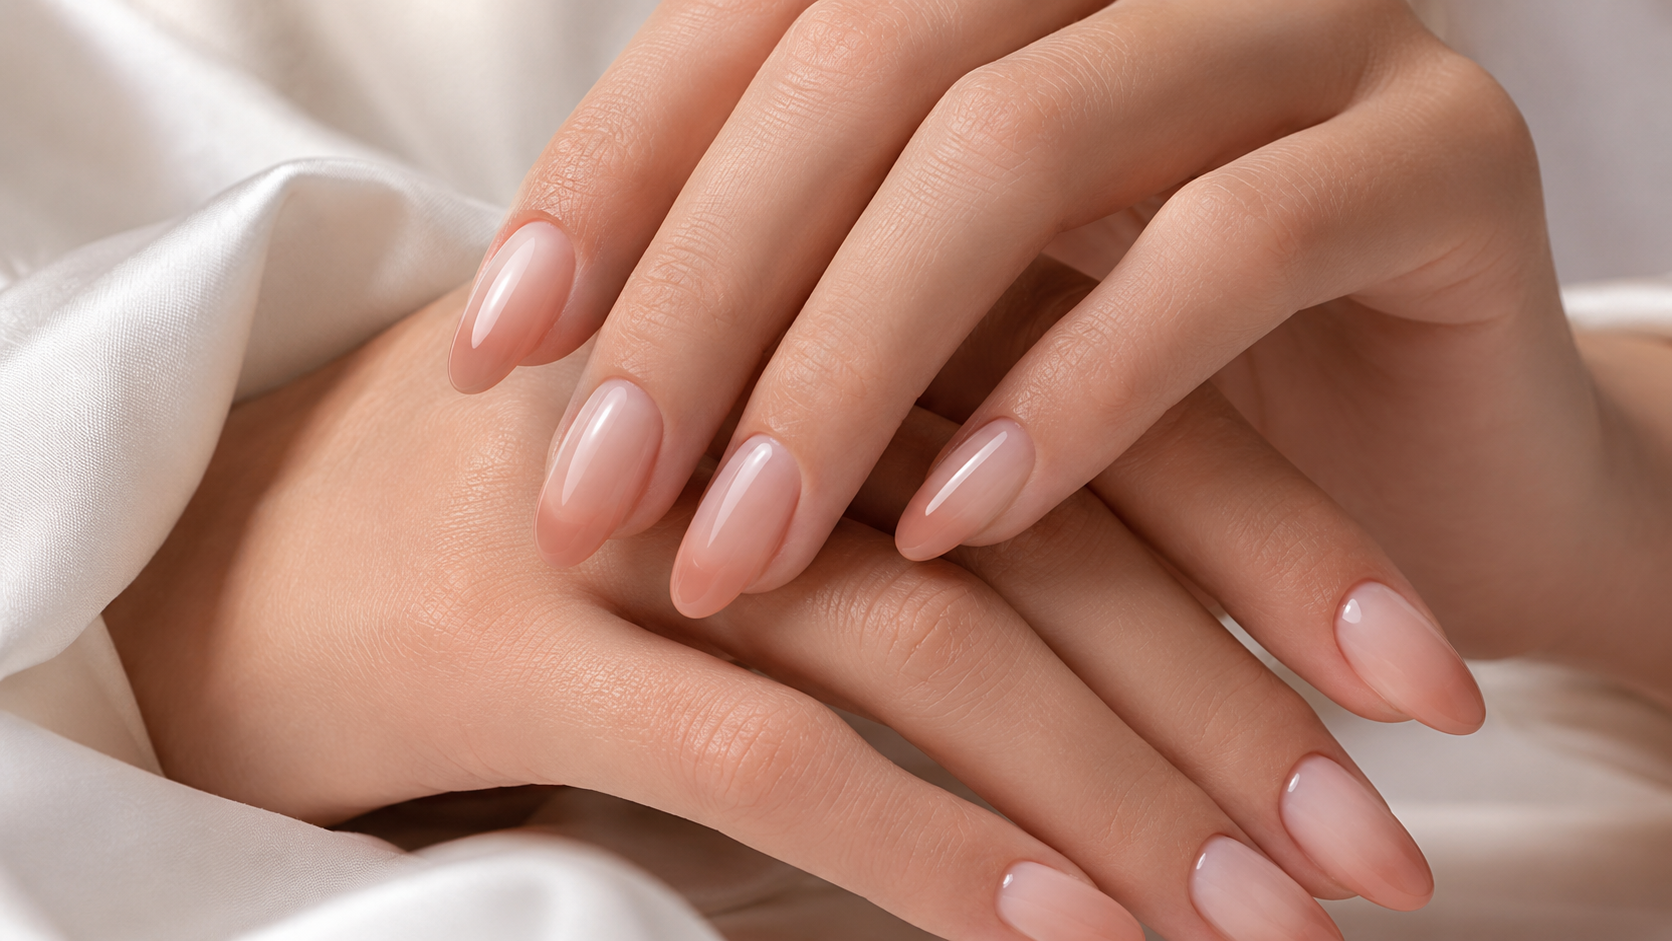
3. Nude Ombre Nails for Everyday Wear
Nude ombre nails are the “clean girl” version of ombre. They look natural, polished, and expensive without screaming for attention.
You can blend beige into milky white, soft brown into nude pink, or caramel into cream. This style suits every nail length, but it looks especially chic on short square or almond nails.
For a more custom look, pick nude shades that match your skin tone. Warm skin tones often look lovely with peachy beige. Cool skin tones usually pair well with rosy nude or taupe.
4. Glitter Ombre Nails
Glitter ombre nails are for the days when subtle is cute, but sparkle feels better. Instead of covering the whole nail in glitter, keep the sparkle concentrated near the tip or cuticle.
A silver glitter fade over nude nails looks elegant. Gold glitter over blush pink feels warm and festive. Meanwhile, iridescent glitter over clear polish gives a fairy-like effect.
The trick is to use a thin glitter layer first. Then add a little more near the edge where you want the sparkle to stand out. This keeps the design soft rather than chunky.
5. Pink Ombre Nails
Pink ombre nails stay in style because they look soft, flattering, and easy to wear. They can look sweet, bold, romantic, or playful depending on the shades you choose.
For a soft look, blend baby pink into milky white. For something brighter, fade hot pink into coral. If you want a moodier style, try rose pink fading into berry.
Pink ombre nails also pair well with tiny details. Add a small heart, pearl accent, chrome powder, or fine glitter line if you want a little extra charm.
6. Blue Ombre Nails
Blue ombre nails feel fresh and calm, almost like a tiny sky on your fingertips. A pale blue-to-white fade looks airy and clean. A navy-to-silver blend feels more dramatic and evening-ready.
If you prefer beachy nails, try turquoise fading into seafoam green. It gives that soft ocean-water effect without needing shell decals or heavy art.
Blue ombre designs look especially good with almond and coffin shapes because those shapes give the gradient more space to stretch.
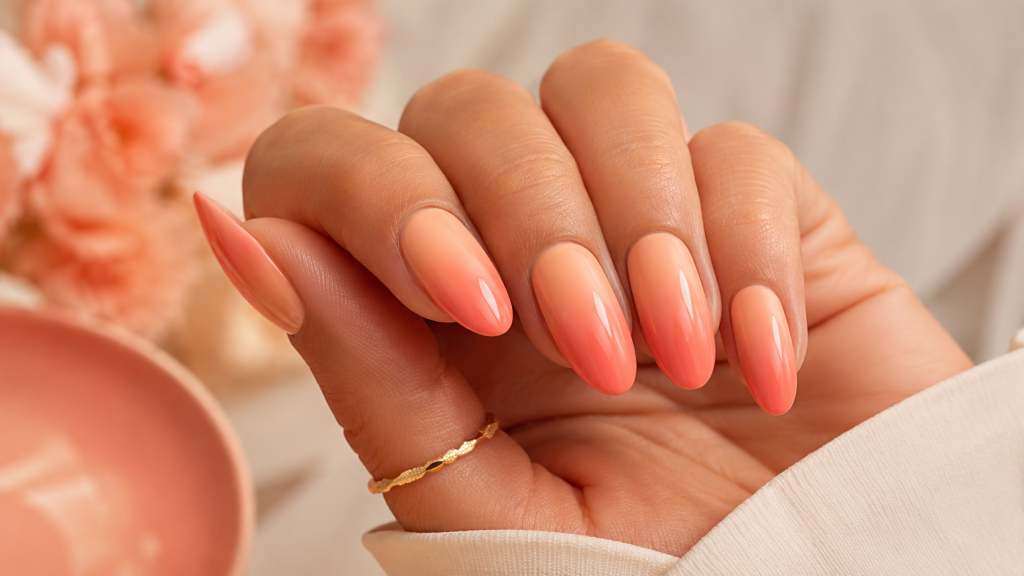
7. Peach and Coral Ombre Nails
Peach and coral ombre nails bring warmth to your manicure. They look bright but still soft, which makes them perfect for vacations, brunch, and sunny weekends.
Start with a peachy nude base. Then blend coral near the tips. You can also add a glossy top coat for a juicy finish.
This color family looks flattering on many skin tones because it has both warmth and softness. It is cheerful without feeling neon.
8. Chrome Ombre Nails
Chrome ombre nails are sleek, trendy, and a little futuristic. Instead of a flat gradient, chrome powder adds a glowing, reflective finish.
You can try pearl chrome over pink ombre for a soft bridal look. Or, go with silver chrome over black tips for something bold.
Chrome works best when the base blend looks smooth. So take your time with the sponge or brush before adding powder. The better the base, the cleaner the shine.
9. Purple Ombre Nails
Purple ombre nails can go soft or moody. Lavender fading into pink feels dreamy and delicate. Plum fading into black looks bold and dramatic.
For a wearable version, try lilac with nude. It gives the nail a gentle color shift without feeling too bright.
Purple ombre also works nicely with shimmer polish. A light shimmer catches the gradient and makes the whole design look more dimensional.
10. Aura-Inspired Ombre Nails
Aura nails are a softer cousin of ombre nails. Instead of fading from tip to base, the color glows from the center outward. The result looks like a blurry halo.
Try a nude base with a pink center, or a milky white base with a lavender glow. This design feels modern, artsy, and surprisingly wearable.
For beginners, aura-style ombre may be easier than classic tip ombre because you can dab color into the center and softly blend the edges.
Tools You’ll Need for At-Home Ombre Nails
Creating ombre nail designs at home becomes much easier when you have the right tools. You do not need a huge nail kit, but a few basics can help you get a smoother blend, cleaner edges, and a more polished finish.
1. SAVILAND 100PCS Nail Sponges for Ombre
These small nail sponges help you dab and blend color without using a bulky makeup sponge. The grabbing pen also gives you better control, which makes this set a helpful choice for beginners.
2. modelones 32 PCS Spring Gel Nail Polish Set
This gel polish kit includes soft seasonal shades, plus base and top coat options. It works well for pastel ombre nails, spring-inspired designs, and gentle color blends.
3. Makartt Nail Art Brushes Set
A good nail brush set helps with blending, lining, French tips, and tiny accent details. The different brush sizes make it easier to clean up edges and refine your ombre finish.
4. Beetles Pastel Gel Polish Set
This pastel polish set is great for soft ombre looks, especially pink, lavender, blue, yellow, and milky color fades. It is a simple option if you want sweet, wearable shades for everyday nails.
5. Beetles Cat Eye Gel Nail Polish Set
For a shimmer or velvet-style ombre effect, cat eye gel polish adds depth and glow. It works especially well for trendy manicures that need a little extra shine without heavy glitter.
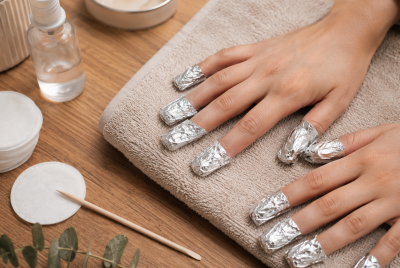
Nail Safety Tips for Gel Ombre Manicures
Ombre nail designs can look soft and polished, but gel polish needs a little extra care. A pretty manicure should not leave your nails thin, sore, or weak.
One concern is the curing lamp. A study on UV nail polish dryers and DNA damage found that UV dryer radiation caused DNA damage and cell stress in tested human and mouse cells. This does not mean every gel manicure is harmful, but frequent gel users should take simple precautions.
Before curing gel nails, apply broad-spectrum sunscreen to the backs of your hands or wear UV-protective fingerless gloves. It is also smart to take breaks between gel sets.
A review on gel nail polish side effects found possible issues such as nail trauma, allergic contact dermatitis, and UV-related skin concerns. These problems can happen more often when gel polish is peeled off, applied too often, or removed poorly.
To protect your nails, avoid picking or scraping off gel polish. Soak it off properly or visit a nail professional. With safe removal, smart prep, and a little hand protection, you can enjoy ombre nail designs while keeping your natural nails healthy.
Conclusion
A soft fade can completely change the feel of a manicure without making it look too busy. From pink-and-white classics to pastel blends, glitter tips, chrome finishes, and aura-inspired styles, there is a look for every season, mood, and nail length. With the right colors, simple tools, and gentle nail care habits, ombre nail designs can feel polished, fresh, and easy to wear. Sometimes, the smallest gradient is all it takes to make your nails feel special.
FAQs
1. What are ombre nail designs?
Ombre nail designs blend one color into another, creating a soft gradient effect. The fade can go from tip to base, side to side, or from the center outward.
2. Is it possible to create ombre nails yourself?
Yes, you can do ombre nails at home with polish, a small sponge, and top coat. Gel polish usually gives you more wear time, but you can still create a pretty ombre look with regular nail polish.
3. Which color combinations work well for ombre nails?
Pink and white, nude and cream, lavender and pink, peach and coral, and blue and white are popular choices. Soft colors usually blend more easily.
4. Do ombre nails look nice on shorter nails?
Yes. Ombre nails look great on short nails because the gradient can make the nail appear longer and more polished.
5. What helps ombre nails stay fresh for more days?
Prep your nails well, use thin polish layers, seal the free edge, and apply a strong top coat. Also, avoid picking or peeling gel polish, since that can weaken your nails.