12 Dragonfly Nail Designs
We may earn a commission for purchases made using our links. Please see our disclosure to learn more.
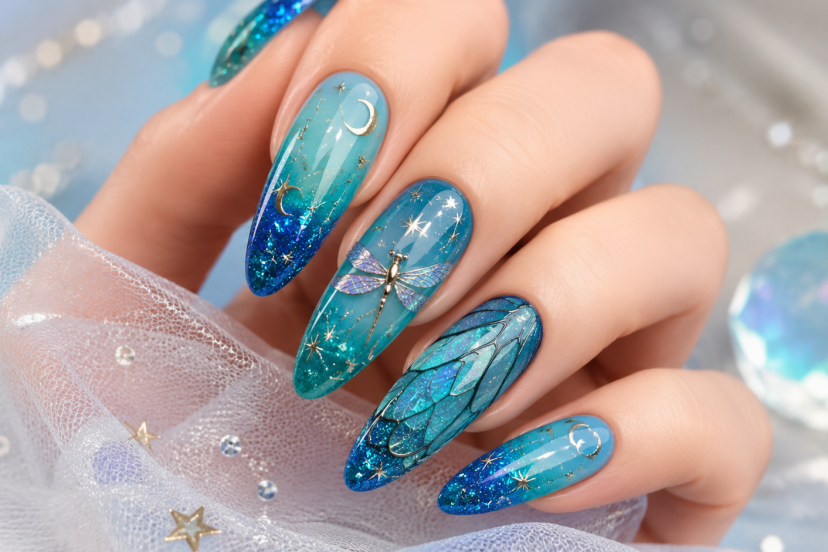
Dragonfly nail art adds a feminine and eye-catching touch to any manicure. You can keep it really simple with a small black border or more attention grabbing with chrome, glitter, flowers or iridescent wings. It looks great on short nails, long extensions and pretty much every nail shape. These 12 designs are the perfect mix of subtle and complex, providing you with tons of inspiration for your next set.
1. Minimalist Black Dragonfly Nails
Begin with a sheer pink, milky white, or nude base. Add a small black dragonfly to one or two nails using a fine liner brush. Keep the body narrow and use light strokes for the wings. Leaving the other nails plain makes the artwork feel crisp rather than busy. This design works especially well on short almond or oval nails.
2. Watercolor Dragonfly Wings
Watercolor wings bring gentle color to the design without creating sharp, heavy blocks of polish. Try pale blue, lavender, blush pink, and mint, allowing the shades to blend slightly. Outline only part of each wing in black or silver. The unfinished edges give the manicure an airy, hand-painted appearance.
3. Iridescent Blue Dragonfly Nails
Dragonfly wings naturally inspire reflective finishes. Start with a cool blue base, then add flashes of turquoise, violet, or green using iridescent flakes. Place a black or dark navy dragonfly over the shimmer so the shape remains visible. A glossy top coat helps the color shifts stand out when the nails catch the light.
4. Purple Aura Dragonfly Nails
Aura nails feature a soft circle of color that fades toward the edges. For this look, blend deep violet into lilac over a neutral or translucent base. Add a small white, silver, or black dragonfly near the center of the glow. The combination feels dreamy but still polished enough for everyday wear.
5. Dragonflies and Wildflowers
Pair dragonflies with tiny daisies, lavender stems, or leafy vines for a garden-inspired manicure. Use a soft cream, pale green, or blush background to keep the set light. Spread the details across several nails rather than squeezing every element onto one. One nail can hold the dragonfly, while neighboring nails carry the flowers and leaves.
6. Dragonfly French Tips
A dragonfly French manicure offers a subtle way to try the theme. Paint thin blue, sage, lilac, or silver tips, then place a tiny dragonfly where the tip meets the natural base. You could also decorate only the ring fingers and keep the remaining nails classic. This approach works nicely for weddings, spring events, and understated vacation nails.
7. Metallic Chrome Dragonflies
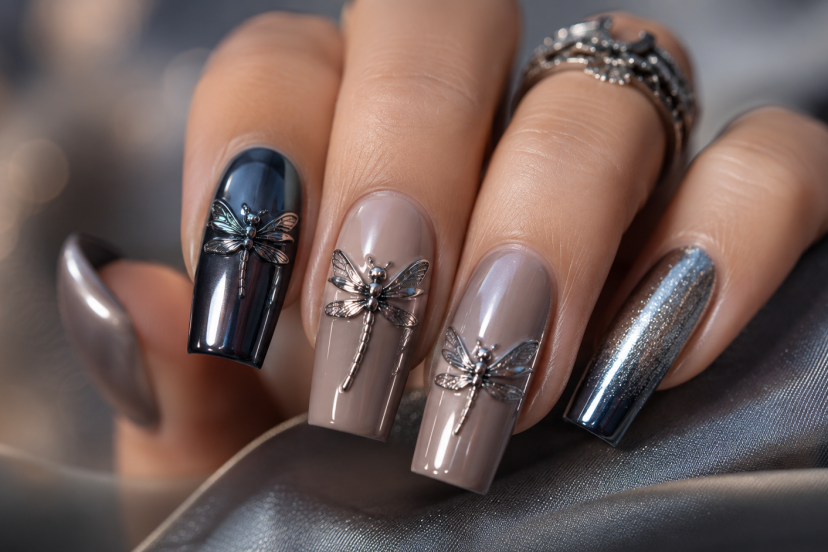
For a bolder finish, apply silver, gold, or multichrome dragonflies over a dark base. Navy, forest green, burgundy, and black create strong contrast. Chrome designs look especially striking on longer almond and coffin nails. Still, one small metallic accent can work beautifully on short nails.
8. Stained-Glass Dragonfly Wings
Use fine black lines to divide each wing into small sections. Fill those spaces with jewel tones such as sapphire blue, emerald green, amber, and violet. You do not need to paint the entire insect on every nail. Enlarging one wing across two accent nails creates a more artistic and less literal interpretation.
9. Nude Negative-Space Nails
Negative-space designs let part of the natural-looking base remain uncovered. Paint a delicate dragonfly outline over clear, beige, or soft pink polish, then add a few small dots around it. This style feels clean and modern. It is also forgiving because the design does not depend on perfectly opaque color.
10. Celestial Dragonfly Nails
Combine dragonflies with stars, crescent moons, and tiny scattered dots. A midnight blue or charcoal base creates a nighttime setting, while silver detailing adds contrast. Use glitter sparingly around the wings to suggest movement. Too much sparkle can hide the dragonfly’s fine outline.
11. Pastel Mismatched Dragonfly Nails
Choose several coordinating pastels rather than one base color. For example, alternate peach, lilac, pale yellow, mint, and sky blue. Add different details to each nail, including miniature dragonflies, dots, flowers, clouds, or simple wing shapes. Repeating two or three colors throughout the set keeps the mismatched design connected.
12. Jeweled 3D Dragonfly Nails
Create a raised dragonfly with small rhinestones, metallic studs, or sculpting gel. Use a narrow gem for the body and tiny crystals for the wings. Because three-dimensional decorations can catch on clothing, keep them limited to one or two accent nails. Secure each piece carefully and seal around its edges without covering the reflective surface.
How to Choose the Right Dragonfly Nail Design
Start by considering how much detail fits comfortably on your nail length. Short nails usually suit small decals, fine outlines, and miniature accent art. Longer nails provide more room for watercolor wings, flowers, chrome, and 3D decorations.
Your usual wardrobe can help guide the colors. Nude, white, black, and silver pair easily with everyday outfits. Blue, purple, and green create a more noticeable nature-inspired look.
You can also apply the artwork over soft gel nail extensions when you want additional length or a consistent shape across the set.
How to Create Dragonfly Nails at Home
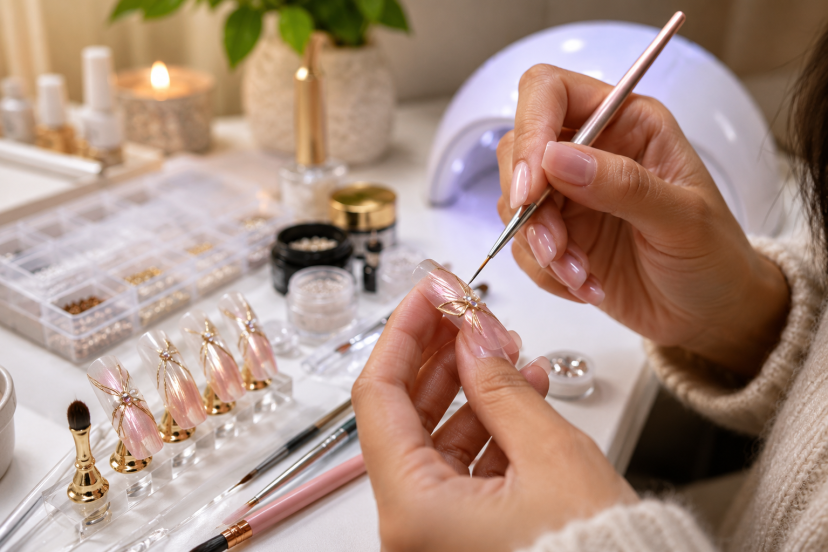
You do not need advanced nail art skills to create a dragonfly manicure. Decals and stickers offer the easiest option, while a fine brush gives you more control over the colors and details.
Step 1: Prepare Your Nails
Remove any old polish, then wash and dry your hands thoroughly. File each nail into your preferred shape and lightly smooth rough edges.
Lightly press the cuticles back with a cuticle pusher. Avoid cutting healthy cuticle tissue, as it helps protect the nail area from irritation and infection.
Wipe each nail with rubbing alcohol or nail cleanser to remove dust, lotion, and natural oils. This step helps the polish adhere more evenly.
Step 2: Apply a Base Coat
Brush on one thin layer of base coat and allow it to dry. A base coat creates a smoother surface and can help prevent dark or brightly colored polish from staining the natural nail.
Keep the layer thin to avoid a bulky finish.
Step 3: Add the Background Color
Apply one or two thin coats of your chosen polish. Nude, pale pink, white, blue, and lavender all work well with dragonfly designs.
Allow regular nail polish to dry between coats. When using gel polish, cure each layer for the time recommended by the product manufacturer.
Step 4: Create the Dragonfly Design
Choose the method that matches your experience level:
- Decals or stickers: Position the design with tweezers and press it flat against the nail.
- Fine liner brush: Paint a thin body first, then add two wings on each side.
- Stamping plate: Apply stamping polish to the dragonfly image and transfer it to the nail.
- Nail foil: Use foil glue or transfer gel to add metallic or iridescent wing details.
Place larger dragonflies slightly off-center. This gives the wings more room and keeps the design from looking crowded.
Step 5: Add Small Details
Once the main design is in place, add dots, glitter, tiny flowers, stars, or rhinestones if desired. Keep the extra details limited so the dragonfly remains the focal point.
For a balanced manicure, decorate one or two accent nails and use simpler colors or patterns on the remaining nails.
Step 6: Seal the Design
Finish with a clear top coat to protect the polish and artwork. Float the brush lightly over decals or hand-painted details instead of pressing down, as too much pressure may smear the design.
For gems or raised decorations, apply top coat or nail glue around their edges. Avoid coating the tops of rhinestones because this can reduce their shine.
Step 7: Let the Manicure Set
Allow regular polish to dry completely before using your hands for chores or exposing the nails to water. Set the gel top coat under your UV led lamp for the curing time listed on the product.
Apply cuticle oil around the finished nails to restore moisture and give the manicure a neat, salon-style appearance.
Helpful Products for Creating Dragonfly Nail Art
Dragonfly Nail Art Decal Sticker
The Dragonfly Nail Art Decal Sticker includes waterslide designs that can be applied over regular polish, gel, acrylic, or other finished nail surfaces. Decals are a practical choice when you want detailed wings without painting them by hand.
Beetles Gel Polish Nail Art Liner Brushes
The Beetles Nail Art Liner Brush Set contains fine brushes intended for lines, flowers, patterns, and small painted details. Different brush lengths can help with both tiny bodies and longer wing outlines.
Makartt Nail Foil Glue Gel
Makartt Nail Foil Glue Gel helps transfer foil patterns onto the nail. It can be useful for creating metallic wings or reflective accents, although it requires compatible foil and proper lamp curing.
OPI Natural Nail Base Coat
OPI Natural Nail Base Coat provides a foundation beneath regular nail lacquer and helps reduce staining from strongly pigmented colors. A smooth base also makes fine artwork easier to position.
Seche Vite Dry Fast Top Coat
Seche Vite Dry Fast Top Coat adds a clear, glossy layer over regular polish. Use light brush pressure when covering decals or hand-painted lines so you do not drag the design.
What Research Says About Nail Art Safety
Beautiful nail art should not leave your skin irritated or your nails damaged. A 2024 literature review of at-home nail cosmetics found that allergic contact dermatitis is a common reaction linked to acrylates in some gel products, nail glues, and acrylic systems.
To lower the risk, keep uncured gel away from your skin and follow the curing instructions carefully. Stop using the product if you notice itching, swelling, blistering, or redness that does not settle.
The American Academy of Dermatology also recommends applying a broad-spectrum, water-resistant sunscreen with SPF 30 or higher to your hands before a gel manicure. Its gel manicure safety guidance advises leaving healthy cuticles intact and consulting a medical professional if unusual nail changes continue.
Conclusion
A pretty dragonfly manicure is all about balance: a prominent focal point, harmonious colors, and elements that can suit the size of your nails. Whether you’re using decals, hand-painting wings, adding chrome accents or tiny gems, good preparation and a smooth top coat will allow the design to look its best and last longer. Pick the design that best suits your skill level, then tweak the colors and position to make it more personalised instead of just copied.
FAQs
Are dragonfly nails suitable for short nails?
Yes. Choose miniature decals, small line drawings, or a single dragonfly accent. Vertical designs can also make a short nail appear slightly longer.
What colors work best for dragonfly nail art?
Blue, purple, green, silver, and iridescent shades reflect the natural shimmer associated with dragonfly wings. However, black line art over nude polish creates an equally attractive minimalist option.
Can I create dragonfly nails without drawing?
Yes. Waterslide decals, stickers, stamping plates, and transfer foils provide detailed results without freehand painting. Seal them carefully with a compatible top coat.
Which nail shape suits a dragonfly design?
Almond and oval nails complement the insect’s curved wings, while square and coffin nails provide more space for larger designs. The right choice ultimately depends on your preferred length and style.
How do I make the dragonfly nail design last longer?
Begin with clean, dry nails and apply thin layers of polish. Cap the free edge with top coat, avoid prolonged water exposure immediately after the manicure, and wear gloves when cleaning.