Pretty Glinda Nails Inspired By Wicked (popular)
We may earn a commission for purchases made using our links. Please see our disclosure to learn more.
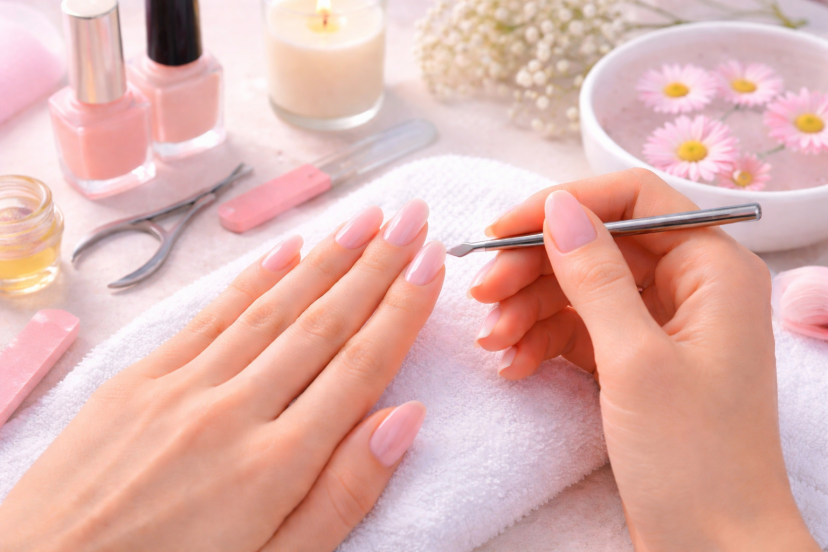
Glinda nails are popular for a reason. They are influenced by Glinda from Wicked and are all about soft, feminine touches. Think sheer pink hues, light shimmer and straightforward, elegant nail art. Nothing was too heavy or over the top. If you want your manicure to look neat, contemporary, and effortless, this is a perfect style pick. In this guide, you’ll discover how Glinda Nails are different, how to achieve the look at home, and a few simple designs you can try out.
The Signature Elements of Glinda Nails
Soft Pink Palette
Pink is at the core of Glinda Nails—but not just any pink. We’re discussing milky pinks, blush tones, and translucent rosy hues that are both natural and sophisticated.
These hues complement just about every skin tone so they make for a safe, but fashionable, bet.
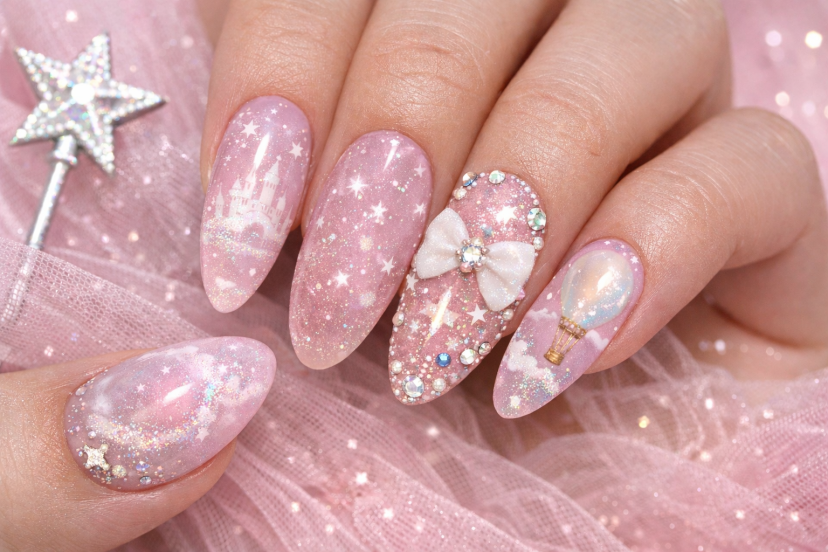
Shimmer and Sparkle
Here’s where the magic kicks in.
Glinda Nails often include:
- Fine glitter
- Chrome finishes
- Pearlescent overlays
But the key is restraint. The sparkle should feel soft, not overwhelming.
Elegant, Feminine Details
You’ll often see:
- Tiny rhinestones
- Subtle ombré fades
- Floral accents
- Glossy top coats
Everything leans toward delicate and polished, never heavy or cluttered.
10 Stunning Glinda Nails Design Ideas to Try
If you’re not sure where to start, here are some Glinda-inspired designs that actually work in real life—not just on Pinterest:
Classic Sheer Pink Gloss
This is the simplest way to get the Glinda effect. Use a sheer pink polish that lets your natural nail show through slightly. Apply a glossy top coat to lock everything in place. It looks clean, soft, and polished—perfect for everyday wear.
Pink Chrome Nails
If you want something a bit more eye-catching, go for a pink chrome finish. After applying your base color, rub chrome powder on top to create that shiny, reflective effect. It catches the light beautifully without looking too bold.
Glitter Gradient Tips
Start with a soft pink base, then add glitter only to the tips of your nails. Blend it slightly downward so it fades into the base color. This creates a subtle sparkle that looks magical but still wearable.
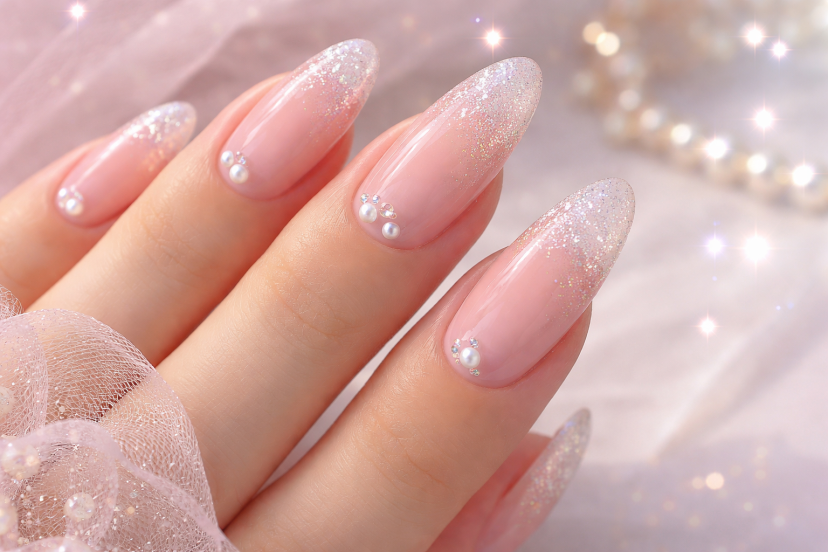
Pearl-Embedded Nails
For this design, place tiny pearls on one or two nails while the polish is still tacky. Keep it minimal—just a few pearls are enough. It gives a soft, elegant look that works well for events or special occasions.
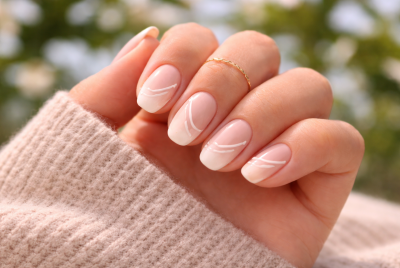
French Tips with a Twist
Instead of the classic white tips, use glitter, shimmer, or a light pink shade. Keep the base soft and natural. This small change makes the design feel fresh while still staying classy.
Baby Pink Ombré
This look blends a soft pink shade into a milky white. Use a sponge or brush to gently blend the colors together. The result is smooth and airy, and it flatters almost every nail shape.
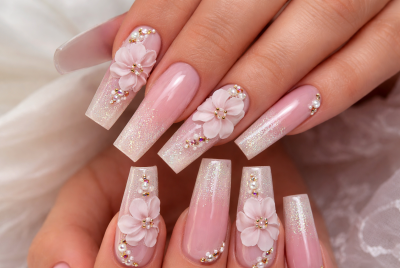
Floral Accent Nails
Pick one or two nails and add tiny flowers using a fine brush or nail stickers. Keep the rest of your nails simple so the design doesn’t feel crowded. This adds a soft, feminine detail without overdoing it.
Rhinestone Cuticle Detail
Place a small rhinestone or two near the cuticle area of your nail. You don’t need much—just a tiny accent. It draws attention in a subtle way and adds a hint of sparkle.
Glossy Almond Nails
Sometimes, the shape does all the work. File your nails into an almond shape, then apply a soft pink polish with a high-gloss finish. This instantly makes your nails look more elegant and refined.
Iridescent Top Coat Finish
Apply a regular pink base, then finish with an iridescent top coat. This adds a soft rainbow-like shine that changes in different lighting. It’s simple but gives your nails that “magical” Glinda touch.
Each of these designs keeps the Glinda aesthetic—soft, elegant, and slightly sparkly—while still being easy enough to try at home.
How to Recreate Glinda Nails at Home
Step-by-Step Guide
Let’s keep this simple and practical:
- Prep your nails – Clean, shape, and push back cuticles
- Apply a base coat – This protects your natural nails
- Choose your pink shade – Go for sheer or milky tones
- Layer for depth – Two thin coats work better than one thick layer
- Add shimmer or accents – Use glitter polish, chrome powder, or tiny gems
- Seal with a glossy top coat – This step brings everything together
Common Mistakes to Avoid
- Using thick layers (they chip faster)
- Overloading with glitter (less is more here)
- Skipping nail prep (this affects longevity)
Must-Have Tools and Products for Glinda Nails
If you want your Glinda Nails to look polished, the tools you use make a real difference. It’s often the small details that separate a quick DIY attempt from a clean, salon-level finish.
To get started, keep these essentials on hand:
- A high-quality nail file
- A cuticle pusher
- Fine nail brushes for detail work
- Dotting tools for subtle designs
- A UV/LED lamp (if you’re using gel polish)
These basics give you better control, smoother application, and a more refined final look. Especially when working with soft gradients, shimmer, or delicate accents.
Nail Health and Longevity: What Research Suggests
Healthy nails are the foundation of any great manicure.
Dermatology research shows that moisture balance plays a major role in nail strength. According to this guide on brittle nails and nail health tips, repeated exposure to water, harsh chemicals, and improper care can weaken the nail structure and lead to splitting or breakage.
That’s why simple habits (like using cuticle oil and keeping nails hydrated) can make a noticeable difference over time.
In addition, scientific evaluation of nail plates found that decorating methods and product application can directly affect nail integrity and pH levels. This study on structural damage and pH changes in nail plates after different nail treatments shows that aggressive or heavy application techniques may increase damage and weaken the nail surface.
In practical terms, a thin, layered application is safer than thick, heavy coats. It reduces stress on the nail plate and helps prevent peeling or lifting.
So yes—your technique matters just as much as your design.
Glinda Nails vs Minimalist Nail Trends
If you love simple nails, you might wonder how this trend compares.
Minimalist nails focus on clean lines and neutral tones. Meanwhile, Glinda Nails adds a touch of sparkle and softness without going over the top.
If you’re into subtle styles, you can actually blend both trends. For example, you can explore soft, simple nail designs like those in this minimalist nail art guide.
That way, you get the best of both worlds—clean and magical.
Conclusion
Glinda Nails are simple, soft, and easy to wear. With the right pink shades, light shimmer, and clean application, you can create a look that feels polished without being overdone. Start with a basic design, keep your layers thin, and focus on small details. Once you get comfortable, you can add sparkle or accents to match your style. The goal isn’t perfection—it’s a clean, elegant finish that works for you.
FAQs
1. What are Glinda Nails exactly?
Glinda Nails are soft, pink, and sparkly nail designs inspired by a feminine, magical aesthetic.
2. Are Glinda Nails suitable for everyday wear?
Yes, they’re subtle enough for daily use while still looking polished and elegant.
3. Can beginners recreate Glinda Nails at home?
Absolutely. Start with simple pink polish and add minimal shimmer or accents.
4. What nail shape works best for Glinda Nails?
Almond and oval shapes enhance the soft, feminine look.
5. How do I make Glinda Nails last longer?
Use thin layers, a strong top coat, and keep your nails hydrated with cuticle oil.