Crystal Nail Designs: 10 Ways to Elevate Your Manicure with Gems
We may earn a commission for purchases made using our links. Please see our disclosure to learn more.
Crystals aren’t just for jewelry anymore—they’ve taken over the nail world too. Crystal nail designs add instant drama, sparkle, and personality to your manicure. One tiny gem can catch the light in a way that makes your hands feel dressed up, even on a casual day. A full set of rhinestones? That’s a statement all on its own. What makes them so exciting is the versatility. You can go soft and subtle with a few delicate accents or bold and fearless with nails that shine brighter than disco lights. Either way, crystals give you a chance to play, express yourself, and wear a little luxury on your fingertips.
Why Crystal Nail Designs Are Taking Over
Crystals have quietly become the ultimate manicure upgrade—no longer reserved for runway nails or high-end salons. What used to be exclusive glam has turned into a DIY-friendly obsession. Beauty influencers now show step-by-step rhinestone application in short clips, making it easier than ever to recreate at home. And when celebrities like Dua Lipa’s rhinestone French manicure go viral, it’s no surprise crystal nails keep stealing the spotlight.
The best part? You don’t have to cover every nail in sparkles to make an impact. Even the tiniest gems can transform your look. Whether you lean toward minimalist chic, bold bling, or wedding-worthy elegance—there’s a crystal design that perfectly matches your style.
10 Stunning Crystal Nail Design Ideas
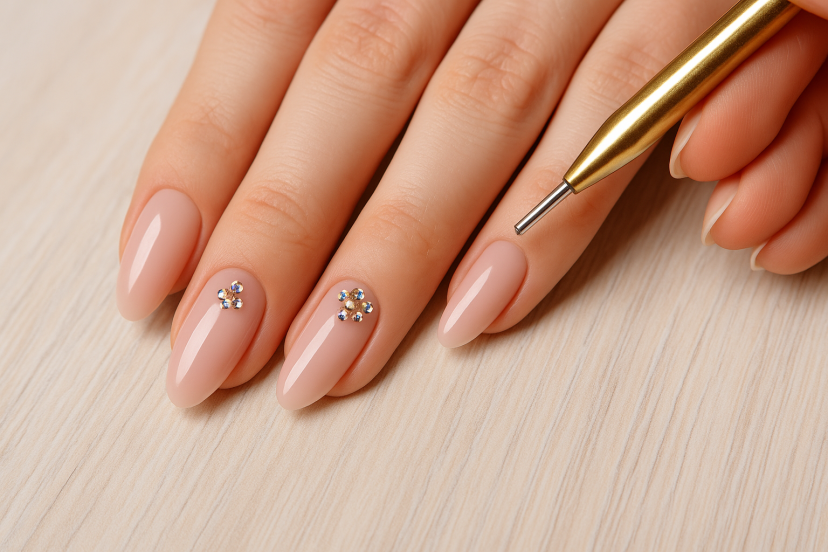
1. Minimalist Sparkle
For everyday glam, try nude or pastel polish with a single tiny crystal at the base of each nail. It’s subtle enough for the office but still gives off a polished, chic vibe.
2. Full-Glam Rhinestone Nails
When you want maximum drama, go for an all-over rhinestone design. Cover your nails in small, shimmering crystals for a “walking disco ball” effect. Not the most practical—but totally worth it for events or photoshoots.
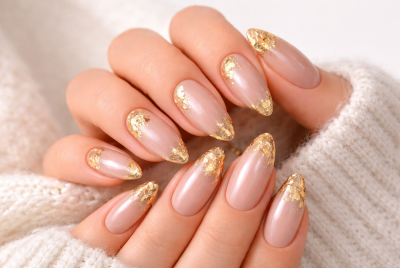
3. Ombre with Crystals
Combine the trendy ombre fade with delicate crystal accents. Place gems near the cuticle or along the fade line to highlight the gradient effect. Gorgeous with pastel pinks or icy blues.
4. Accent Nail with Gems
If full bling feels too much, choose just one or two accent nails. For example, polish nine nails in your favorite color and decorate only the ring finger with a crystal design. Balance is everything.
5. Geometric Crystal Patterns
Create bold shapes—triangles, chevrons, or lines—using small rhinestones. Geometric designs are modern, sleek, and surprisingly easy to achieve with a steady hand and good glue.
6. French Tips with Crystal Lining
Upgrade the classic French manicure by lining the tip with micro-crystals. It keeps the elegance of French nails but adds a playful sparkle twist.
7. Crystal Clusters
Instead of spreading gems evenly, cluster them on one or two nails for a spotlight effect. It gives a luxurious, textured appearance that feels expensive without costing a fortune.
8. Negative Space Designs
Use crystals strategically on bare parts of the nail for an artsy vibe. Pair with transparent polish for a gallery-worthy manicure.
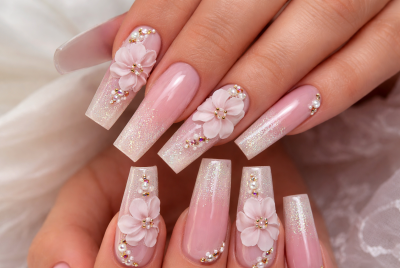
9. 3D Crystal Nail Art
For those who love drama, experiment with larger gems and unusual shapes. Think bold, chunky crystals that give your nails a sculptural, 3D look. Perfect for festivals or fashion-forward moments.
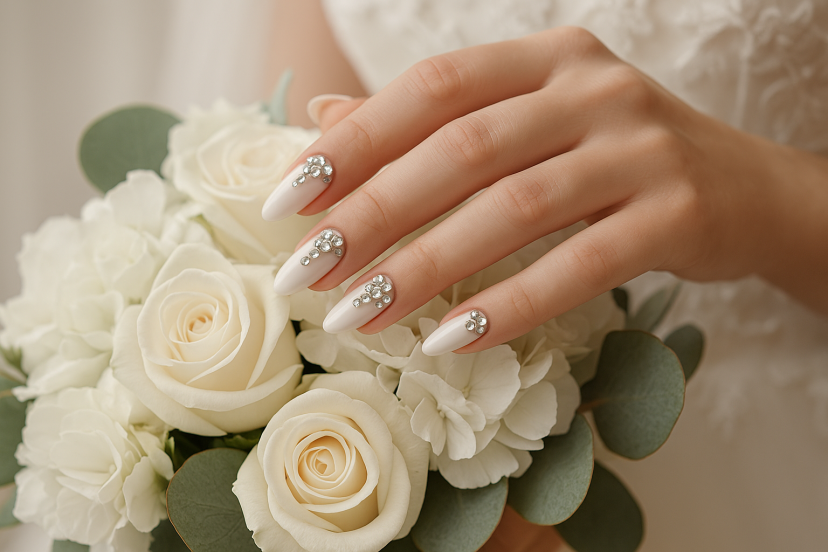
10. Bridal Crystal Nails
Soft whites, creamy nudes, and subtle sparkle never go out of style for weddings. Delicate crystal accents add elegance without overwhelming the bride’s look.
Tools of the Trade: Must-Have Nail Art Essentials
Crystals may look glamorous, but the magic is in the tools. To make them stick (and stay), you’ll need a few basics:
- Rhinestone picker tools for precision placement
- Strong nail glue or gel adhesive to keep gems from falling off
- Top coat sealers to lock everything in
- Detail brushes for clean application
- UV/LED nail lamp to cure gel polish and secure rhinestones
And for freehand designs that mix polish with crystals, don’t forget about nail art pens. They let you sketch lines, dots, and shapes before topping them with gems—ideal for creating salon-worthy details at home.

How to Make Your Crystal Nails Last Longer
Nothing deflates the fun of crystal nail designs faster than seeing your gems drop off. With the right prep and care, however, your manicure can maintain sparkle for days—sometimes even weeks. Science backs this up, and here’s how to leverage that knowledge for your own nails.
- Prep your nails properly. Buff gently and wipe away all oils or residues before applying glue or polish. A clean, slightly roughened surface helps adhesives bond more securely.
- Use gel or hybrid systems over regular polish. Research on the durability of different manicure types shows that classic polish lasts only 5–7 days, while gel and hybrid manicures—thanks to UV/LED curing—can last two weeks or longer.
- Strategic crystal placement. Avoid putting heavy gems near the tip where friction is highest. Instead, favor the mid or base of the nail where stress is lower.
- Apply more than one layer of top coat for extra hold. One thin coat isn’t always enough. Two to three thin layers, cured properly, create a protective shell that helps lock crystals in.
- Be gentle with your hands. Frequent washing, harsh cleaning, or rough handling can dislodge gems. Wearing protective gloves during chores is a smart move.
- Plan for touch-ups. If you’re wearing crystal nails to an event or wedding, schedule a quick check or touch-up midway through your wear period.
Interestingly, findings from a study on bonding durability highlight how stronger surface adhesion and curing techniques lead to longer-lasting results. While the research focuses on adhesive systems in a medical context, the same principles apply to nail art: proper prep and the right bonding products extend the life of your design.
With the right combination of surface prep, quality glue, curing, and smart placement, your crystal nail designs can stay dazzling far beyond the first 48 hours—sometimes up to two weeks or more, depending on your routine.
Conclusion
Crystal nail designs aren’t just about sparkle—they’re about expression. Whether you’re adding one delicate gem or going full-on with rhinestone clusters, crystals give your manicure personality. With the right tools, some patience, and a touch of creativity, you can create salon-worthy looks at home.
So, why settle for plain polish when your nails could shine like tiny jewels? Try one of these designs, experiment with nail art pens, and let your hands do the talking—because crystal nails aren’t just a trend, they’re a statement.
FAQs
1. How long will crystal nail designs stay on?
With strong glue and a top coat, they can last up to two weeks. Gel manicures hold crystals even longer.
2. Can I reuse nail crystals?
Yes! If you gently remove them, clean, and store them properly, you can reuse them multiple times.
3. Do crystals harm natural nails?
Only if removed incorrectly—gentle application and proper removal keep your nails safe. Avoid peeling them off—soak or file carefully instead.
4. What’s the best glue for crystals?
Special rhinestone nail glue or gel adhesive works best. Regular polish won’t hold heavy crystals.
5. Are crystal nails practical for everyday life?
Minimalist designs are absolutely practical. Full glam looks are better saved for parties, weddings, or events.