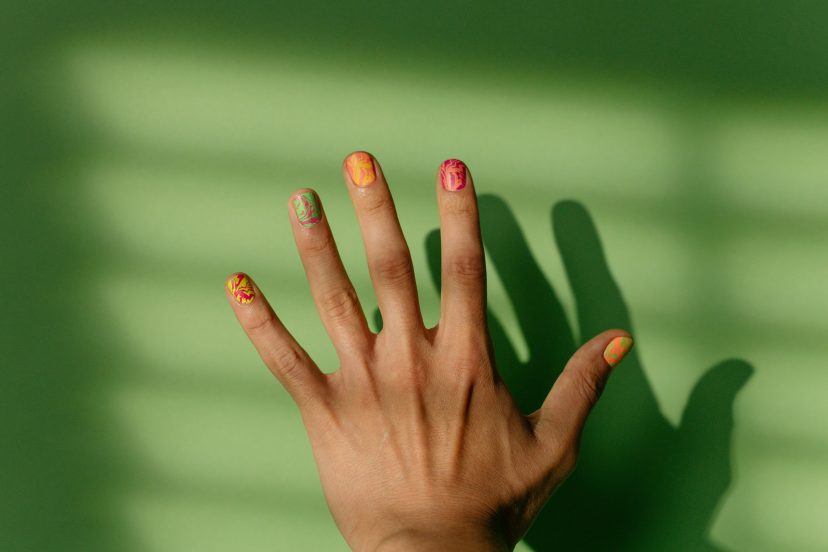
Nail Art Stickers That Make Your Manicure Pop

We may earn a commission for purchases made using our links. Please see our disclosure to learn more.
Love the look of salon nails but not the price tag or time commitment? Nail art stickers are your shortcut to stunning designs without the fuss. These easy-to-apply decals turn a simple manicure into something eye-catching in minutes. Whether you’re after sleek minimalism or playful patterns, nail art stickers make it effortless to express your style—no steady hand or special tools required.
Types of Nail Art Stickers (and When to Use Each)
Nail stickers come in different materials and finishes—each with a distinct purpose and personality. Understanding them can save you frustration and help your nails look picture-perfect longer.
1. Vinyl/Adhesive Stickers
These are the classic peel-and-stick type. They’re slightly thicker and ideal for bold geometric patterns or cut-out shapes. Perfect over fully dried polish or cured gel, vinyl stickers make designs crisp and graphic.
2. Ultra-Thin Gel Decals
These delicate stickers melt seamlessly under a gel top coat. They’re ideal for intricate line art, fine lettering, or minimalist accents. Because they’re paper-thin, they lay flat without leaving edges you can feel.
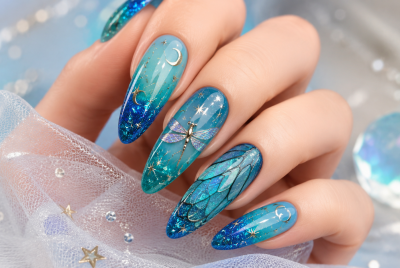
3. Water-Transfer Stickers
These little wonders slide onto the nail after soaking in water. They’re known for dreamy watercolor prints, florals, and gradients. Think of them as the temporary tattoos of the nail world—soft, subtle, and endlessly elegant.
4. Metallic Foil Sheets
Foils bring the drama—chrome finishes, shattered glass effects, and holographic tones. They require a sticky base layer or foil glue, but the payoff is an ultra-glossy, editorial finish.
5. 3D Embellishment Stickers
From pearls to studs to embossed details, 3D stickers give texture and luxury. Best for accent nails, they stand out beautifully under a thick, sealing top coat.
Top 5 Nail Art Stickers You’ll Love
Below are a few sticker types worth trying—whether you’re a beginner or a seasoned DIY nail artist.
1) 50 Sheets Nail Art Stickers
Why you’ll love them: This massive 50-sheet set includes everything from delicate florals to abstract lines and butterfly motifs. It’s perfect for anyone who loves switching up their nail style every week.
Best for: Creative DIY lovers who enjoy experimenting with different looks.
Pro tip: Mix matte and glossy base coats underneath for extra contrast and depth.
2) Gold Nail Art Stickers Kit
Why you’ll love them: These elegant gold decals are perfect for classy, metallic looks. You’ll find minimalist shapes, stars, and fine lines that add instant polish to any manicure.
Best for: Special occasions, date nights, or anyone craving a subtle touch of luxury.
Pro tip: Try layering the gold stickers over dark polish for a bold, designer-inspired finish.
3) 3D Self-Adhesive Nail Stickers
Why you’ll love them: With their mix of pearls, studs, and tiny gems, these 3D stickers turn a basic manicure into a statement piece. They’re also easy to apply—just peel, place, and seal.
Best for: Accent nails or when you want a little extra glam.
Pro tip: Apply a thick gel top coat to lock in the 3D details and prevent snagging.
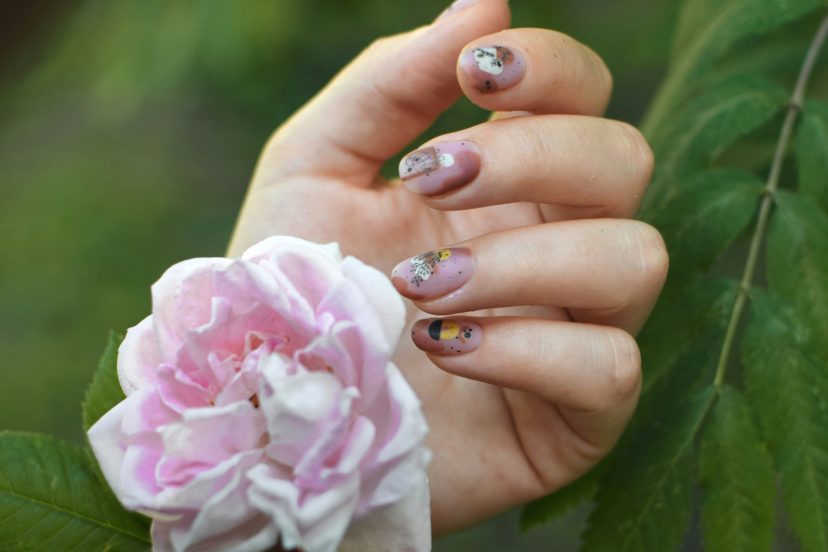
4) Water Transfer Nail Decals (Floral Series)
Why you’ll love them: Soft watercolor flowers and delicate leaves make these decals perfect for romantic, vintage-inspired manicures. They blend beautifully into both pastel and nude bases.
Best for: Everyday wear or spring-inspired styles.
Pro tip: Pat off any excess water before sealing with top coat for a smooth, bubble-free finish.
5) Gel Nail Strips Stickers
Why you’ll love them: Kiss has mastered at-home manicures, and their gel stickers prove it. These semi-cured gels cure under UV or LED light for a glossy, chip-resistant finish that rivals salon quality.
Best for: Busy weeks when you need long-lasting, low-maintenance nails.
Pro tip: Keep your nails and cuticles moisturized daily to help the stickers stay put longer.
Product Comparison Table
| Product Name | Type | Design Style | Best For |
| 50 Sheets Nail Art Stickers | Adhesive | Mixed (floral, geometric, abstract) | Variety lovers |
| Gold Nail Art Stickers Kit | Adhesive | Metallic gold accents | Elegant looks |
| 3D Self-Adhesive Nail Stickers | 3D Raised | Pearls, gems, studs | Glam accents |
| Water Transfer Floral Decals | Water-transfer | Floral & watercolor | Soft, romantic nails |
| Gel Nail Strips Stickers | Semi-cured Gel | Glossy solid & shimmer | Long wear |
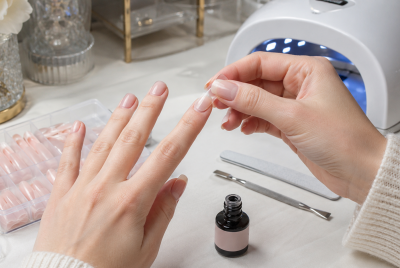
How to Apply Nail Art Stickers Like a Pro
Even the most stunning sticker can fall flat without proper technique. Here’s how to make yours last longer and look flawless:
- Prep Like a Pro:
Clean your nails with alcohol or a prep solution. A smooth, oil-free surface ensures strong adhesion. - Polish Base:
Apply your favorite color and let it dry completely. For gel polish, cure as usual. - Plan Your Design:
Before peeling off the backing, use tweezers to position the sticker on your nail to visualize placement. - Apply Carefully:
Stick from the cuticle outward, smoothing as you go to prevent bubbles or creases. - Seal It Up:
Finish with a clear top coat, making sure to cover the edges to lock everything in. - Cure or Air-Dry:
Depending on your polish type, either let the top coat dry naturally or cure it under a lamp.
That’s it—you’ve just upgraded your manicure game in minutes.
Make It Last: Top Coats, Sealing, and Removal
Your stickers are only as good as your sealing technique. A medium-viscosity, self-leveling top coat helps the design blend seamlessly and prevents lifting.
For regular polish users: Apply a top coat every 2–3 days to refresh shine and protection.
For gel lovers: A single, thick layer cured under UV or LED light keeps stickers flawless for up to two weeks.
When you’re ready to take them off, skip the urge to peel—let remover do the work instead. Soak a cotton pad in remover, press it on for 20–30 seconds, and gently slide the sticker away. Follow with cuticle oil to keep nails hydrated and healthy.
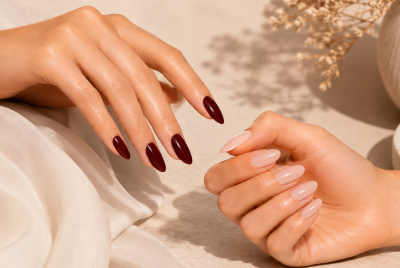
The Best Times to Use Stickers vs. Hand-Painted Art
Use stickers when you want symmetry, clean lines, or repeating motifs that would take hours by hand. Stickers shine at parties, vacations, or anytime you want salon nails fast.
Reserve hand-painting for creative freedom—ombre shading, abstract art, or personalized designs. Many pros actually combine both: stickers for structure, brushes for soft details.
Safety Notes and Skin-Friendly Choices
If your skin tends to be sensitive, opt for stickers labeled hypoallergenic or HEMA-free. Some adhesives can cause irritation, especially if they come into contact with the skin. Always avoid direct contact between adhesives and your cuticles, and don’t over-buff your nails before application—this thins the natural nail plate.
Moisturize regularly with cuticle oil to keep your nails flexible and less prone to lifting. Small habits make a big difference in long-term nail health.
What Experts and Brands Say About Nail Art Stickers
When it comes to nail art stickers, both beauty brands and everyday users agree on one thing — it’s all about the application. L’Oréal Paris, in their guide on how to apply nail stickers, emphasizes that even though stickers are quick and fun, they still need a little care to look professional. The article highlights the importance of cleaning your nails before application, pressing stickers from the cuticle upward to avoid bubbles, and sealing them with a clear top coat for shine and durability. When done right, they can last up to two weeks — pretty impressive for something you can apply in minutes.

Meanwhile, EyeCandys explores the next level of DIY manicures with semi-cured gel stickers. These aren’t your typical adhesives — they’re real gel layers that you finish under a UV or LED lamp, giving that glossy, salon-grade look without harsh chemicals or long drying times. The brand explains that these stickers are designed to be gentle on natural nails and easy to remove, which makes them ideal for anyone who wants a polished look but doesn’t have the time or budget for regular salon visits.
Both perspectives show that nail art stickers have come a long way. Whether you prefer the simplicity of classic adhesive styles or the sleek finish of gel versions, the key is technique. Clean nails, careful placement, and a good top coat make all the difference between a quick fix and a flawless manicure that looks like it was done by a pro.
Trend Pairings You’ll Love
The right sticker combo can completely transform your mani. If you love cozy seasonal looks, pair metallic accents with autumn tones like burnt orange or olive green. Want inspiration? Explore Fall Nail Combos for trendy color palettes that pair beautifully with sticker art.
In spring, try delicate pastels with micro florals. For summer, go bold with neon decals and foil overlays. And when winter rolls in, switch to deep jewel tones with silver accents for that festive sparkle.
Easy Fixes for Nail Sticker Fails
Even with perfect prep, little hiccups can happen. Here’s how to fix them fast:
- Wrinkles: Use a silicone tool or clean fingertip to gently smooth from the center outward.
- Lifting: Apply a drop of clear top coat under the edge and press firmly.
- Fading: Use a UV-blocking top coat to preserve color vibrancy.
- Uneven Edges: Gently file or clip, then reseal.
- Texture: Add a second layer of top coat for a smoother finish.
Conclusion
Nail art stickers are proof that great design doesn’t have to mean great effort. Whether you’re prepping for a night out or just want something fun midweek, they deliver instant style and confidence. With a little prep, the right products, and consistent sealing, you’ll enjoy nails that look freshly done every single day. So go ahead—try that foil accent, layer those florals, or test a new gel sticker set. Once you master the basics, your nails will always look ready for their close-up.
FAQs
1) Do nail art stickers harm your nails?
Not if removed properly. Soak a pad in remover, press it on for 30 seconds, and gently slide off the sticker. Follow with cuticle oil.
2) Do stickers work over regular polish and gel?
Yes. Just make sure regular polish is fully dry before applying. For gels, apply stickers after curing the color layer, then seal again.
3) How long will your nail stickers hold up?
Typically 5–10 days on regular polish, and up to two weeks under gel.
4) Can I mix stickers and hand-painted designs?
Definitely! Combine stickers for clean patterns with hand-painting for softer artistic effects.
5) What’s the best top coat for stickers?
Use a self-leveling, medium-thick formula that smooths out edges and adds a glassy shine.